ESCAPE MANUAL
MONOCHROME Roblox Full Walkthrough: Four-Key Escape Guide
Step-by-step MONOCHROME Roblox walkthrough for the corridor route, four-key search, run-specific keypad clue, monster survival, and elevator escape.
Overview
If you are looking for a complete MONOCHROME Roblox full walkthrough, the current objective requires you to collect four physical keys and one four-digit code to unlock the elevator and escape the abandoned corridor network. Based on reviewed runs from September 2026, the experience begins in a sealed upstairs elevator lobby, transitions into a branching downstairs maze, and concludes by satisfying both a mechanical four-lock panel and an electronic keypad. This guide breaks down the exact route access, search methodology, survival pacing, exit verification, and troubleshooting steps so you can navigate the early-development build efficiently and avoid common dead ends.
Initial Lobby Setup and Route Access
Current reviewed builds place you in an upstairs elevator lobby that functions as your central hub and respawn point. The space contains three critical interactive elements: the elevator doors, a four-lock panel mounted near the doors, and a digital keypad adjacent to the panel. Across from these controls is a doorway marked with a DO NOT ENTER sign that has been completely boarded up. According to both independent walkthroughs, the official objective cannot progress until you clear these boards and descend into the corridor network below.
To open the route, approach the boarded doorway and interact with it. The reviewed build requires a sustained hold interaction rather than a single tap. Maintain the prompt until the boards break away, revealing a staircase or drop-down path leading downstairs. Once the boards are removed, the lobby remains accessible, but the actual puzzle progression happens in the lower corridors. Note that the official Roblox description classifies this experience as early development, and the exact corridor layout or key room placements may shift between sessions or developer updates. Treat the lobby as your secure baseline and return to it frequently to verify progress.
Systematic Search Method for the Four Keys
The downstairs area consists of repeating corridor branches lined with furniture, primarily dressers and drawers. Your primary task is to locate the four keys hidden within these containers. Both reviewed guides emphasize that a methodical search pattern is essential because the maze structure can cause disorientation, and carrying multiple keys during long sweeps increases the risk of losing progress if you encounter the corridor creature.
Begin by selecting one corridor branch and clearing it completely. Interact with every dresser and drawer you encounter. When you open a container and find it empty, leave the drawer or cabinet door open. Multiple reviewers confirm that leaving searched drawers open creates a visible environmental marker, which significantly reduces repeated room checks and prevents you from wasting time re-sweeping cleared areas. If you find a key, collect it and immediately return to the upstairs lobby rather than continuing the sweep.
Once back in the lobby, approach the four-lock panel and insert the recovered key. The panel provides immediate visual feedback: each successfully inserted key triggers one green indicator light, confirming that one deadbolt has been cleared. Repeat this process until all four keys are installed and four green lights are visible. This prompt-return strategy is recommended because it minimizes inventory management stress, secures your progress against sudden encounters, and allows you to track exactly how many keys remain in the maze.
Locating and Entering the Run-Specific Keypad Code
While the four keys handle the mechanical locks, the elevator also requires an electronic override. The current build hides a four-digit clue somewhere within the downstairs maze. Reviewed runs describe this clue as a slip of paper or a printed block resting on a pale surface or standalone block in one of the corridor rooms. The digits displayed on this item are your keypad code.
It is critical to understand that the keypad number is not universal. Separate reviewed runs report different four-digit values, and the official Roblox description does not document a fixed code. You must locate the slip or block in your own session, memorize or note the exact four digits shown, and return to the lobby keypad to enter them. The game does not use a traditional Roblox promo-code redemption menu for this step; you simply input the digits directly into the in-game keypad interface.
If the elevator does not respond after entering the code, verify that the digits match exactly what you saw on the slip. The system does not provide partial confirmation for incorrect entries, so double-checking the clue location and re-entering the sequence is the standard troubleshooting step. The keypad and the four-lock panel operate independently, meaning you can enter the code at any time, but the elevator will only activate once both systems are satisfied.
Survival Decisions and Creature Avoidance
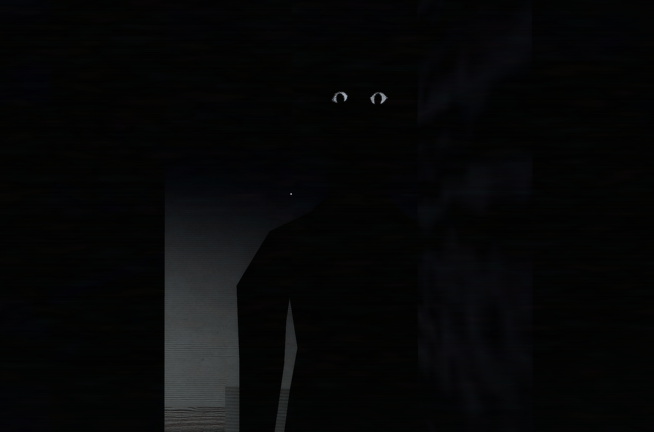
Navigation in MONOCHROME is complicated by an unspecified presence that patrols the downstairs corridors. The official description references being watched by an entity, and reviewed runs confirm that direct contact with this creature results in a life loss and an immediate respawn back in the upstairs elevator lobby. Your inventory and installed keys are preserved, but time and momentum are lost, making avoidance a core gameplay priority.
Wardrobes scattered throughout the lower corridors serve as temporary hiding places. When you hear or see signs of the creature approaching, step into a nearby wardrobe and wait until the patrol passes. The reviewed guides stress that hiding should be used reactively rather than as a permanent shelter. Your safest repeatable approach is to clear one branch methodically, always preserve a clear return route to the stairs, and stop interacting with furniture the moment danger approaches.
Pacing is more important than speed. Rushing through drawers increases noise and interaction time, which raises the likelihood of triggering an encounter. If you are deep in a branch and the creature appears, prioritize reaching the nearest wardrobe or retreating to the lobby rather than attempting to finish the current room. The maze design allows for multiple re-entry points, so abandoning a partially cleared section temporarily is a valid survival decision. Return to it only when the corridor is clear and your return path is secure.
Exit Sequence and Lock System Troubleshooting
The completion sequence begins only when both lock systems are fully satisfied. The elevator requires an accepted keypad entry and all four green key indicators on the panel. Once these conditions are met, a new interaction prompt appears on the elevator doors labeled Open Elevator. Activate this prompt to trigger the escape sequence and complete the current session.
If the Open Elevator prompt does not appear, systematically verify your progress. First, check the four-lock panel. If fewer than four green lights are illuminated, you are still missing keys in the maze. Return downstairs, follow your open-drawer markers to identify unsearched furniture, and resume the branch-clearing method. Second, verify the keypad. If the panel shows four green lights but the elevator remains locked, the electronic code has either not been entered or was entered incorrectly. Revisit the maze to locate the slip or block, confirm the four digits, and re-enter them at the lobby keypad.
Additional troubleshooting notes based on reviewed runs: the game does not provide a traditional inventory screen for keys, so progress tracking relies entirely on the panel lights. If you respawn after an encounter, your installed keys remain in the panel, but you must re-enter the keypad code if the session resets the electronic lock state. Always treat the lobby as your verification hub before committing to another downstairs sweep. If you are stuck in a loop of cleared branches with no keys found, backtrack to the staircase and check adjacent corridors you may have bypassed, as early-development builds occasionally shift item placement between runs.
Build Status and Expected Variations
MONOCHROME is currently in early development, and the developer has publicly noted that Part Two is in progress. This means the corridor layout, exact key room locations, and monster patrol patterns are subject to change in future updates. The official Roblox description does not document permanent item placements, universal keypad numbers, or detailed monster sensing rules. The strategies outlined in this guide reflect current build observations from September 2026 and should be treated as reliable for the present version while remaining adaptable to developer adjustments.
When playing, prioritize the systematic search markers, prompt key installation, and reactive wardrobe usage, as these are consistent mechanics across reviewed sessions. Keep a mental note of any layout changes you encounter, and always verify the four green indicators and the run-specific code before attempting the exit. This approach ensures you can complete the four-key escape efficiently regardless of minor environmental shifts.
Keep the page honest
Use the version scope, source status, and verification date above when you quote this guide. If the game UI or source changes, update the claim before expanding the recommendation.
Sources to check