FOUR-LOCK INDEX
MONOCHROME Roblox Key Locations: Find All Four Keys
Find all four MONOCHROME Roblox keys with a repeatable downstairs sweep, open-drawer markers, elevator indicators, and current-build risk management.
Overview
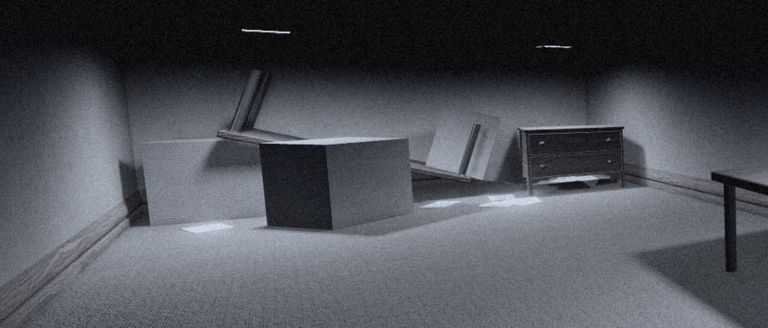
In MONOCHROME Roblox, the escape objective requires collecting exactly four keys hidden within interactable dressers and drawers throughout the downstairs corridor network. Current walkthroughs confirm that keys are not placed on open surfaces or in fixed named rooms; instead, they demand a systematic furniture search. Players should execute a section-by-section sweep, leave opened drawers as visual markers, and return each key to the upstairs elevator panel to advance progress. Installing keys promptly reduces risk, and the panel's green indicators provide a reliable count of collected items. Once all four keys are inserted, the mechanical lock clears, though the run remains incomplete until the keypad clue is resolved.
Key Search Strategy and Container Checks
Keys in MONOCHROME are concealed inside interactable furniture rather than left visible on floors or tables. Evidence from the September 12, 2026 build indicates that dressers and drawers within the downstairs corridor network are the primary containers. When a player interacts with a container holding a key, the game displays a "Take Key" prompt, which serves as the definitive confirmation that the item has been recovered. Without this prompt, the container is empty, and the search should continue.
The reviewed sources do not support the existence of four permanent named key rooms. Placement can vary, and memorizing a single room is unreliable. Players must treat the search as a dynamic process. The game environment features repeating visual layouts, which can make tracking progress difficult without a consistent method. The recommended approach is to clear one adjacent section at a time, inspecting every available dresser and drawer before moving to the next area. This prevents untracked loops through similar rooms and ensures comprehensive coverage of the search space.
The downstairs corridor network connects multiple rooms with similar aesthetics. Players should treat the network as a series of connected zones. Entering a room and inspecting every dresser and drawer before exiting to the next nearby area ensures no container is missed. This method is more reliable than making untracked loops through similar rooms, which can lead to redundant searches and increased exposure to threats. If a key is found in one area, guides suggest searching nearby furniture immediately, as placement may cluster within a local zone rather than distributing evenly across the entire map.
Route Marking and Search Efficiency
Because the downstairs area contains numerous visually similar containers, tracking which furniture has been searched is essential for efficiency. Walkthroughs recommend leaving each searched drawer open after inspection. This action turns the furniture state into a simple, persistent route marker that distinguishes checked areas from unsearched ones. When returning to a corridor or looping back to avoid a threat, players can quickly identify which drawers remain closed and prioritize those for inspection.
The visual repetition of the environment means that two drawers in different rooms may look identical. The open-drawer marker is the only way to distinguish them once the search is complete. Players should make a habit of interacting with every drawer, even if it appears unlikely to contain a key. Missing a single container can delay the run significantly. The marker system also aids in coordinating with other players, as the state of the furniture communicates search progress without verbal communication.
This marker system supports the section-based sweep strategy. By clearing one adjacent section completely before advancing, players maintain spatial awareness and reduce the cognitive load of remembering specific container locations. If a player must retreat and return, the search state remains visible without requiring external notes. The open drawers act as a breadcrumb trail, confirming that a thorough search has already occurred in that zone and directing attention to unmarked furniture elsewhere.
Key Installation and Progress Tracking
Recovered keys must be transported to the upstairs elevator panel for installation. The panel features a four-lock mechanism where each key is inserted separately. Upon successful insertion, the corresponding indicator changes to green, providing immediate visual feedback that the deadbolt has been cleared. The panel itself functions as the reliable progress counter for the run; the number of green indicators directly reflects the number of keys installed.
Players should verify the green state after every insertion to confirm the key was registered correctly. Since the elevator requires all four indicators to turn green before proceeding, the panel status is the authoritative measure of completion for the mechanical lock phase. This system allows players to track their advancement objectively, regardless of how many keys are currently held in inventory. If a key is lost or dropped, the panel state reveals exactly which slots remain unfilled, directing the search effort toward the remaining requirements.
The installation process is separate for each key. Players do not insert keys simultaneously; they must return to the panel and place each key individually. This allows for incremental progress tracking. The green indicators provide a psychological checkpoint, confirming that each key contributes to the overall objective. Monitoring the panel ensures that players can distinguish between keys held in inventory and keys that have been secured, preventing confusion during the search phase.
Risk Management and Key Handling
Risk management is critical during the key search phase. Guides advise installing recovered keys promptly rather than carrying them during extended searches. Transporting a key back to the elevator panel immediately after finding it reduces the potential cost of being caught or interrupted. While key persistence after death or updates is not guaranteed by official sources, minimizing the time keys are held in inventory lowers the risk of losing progress.
The recommended workflow involves finding a key, securing the "Take Key" confirmation, and retreating to the upstairs panel as soon as the path is safe. This cycle of search, recovery, and installation creates a safer rhythm than attempting to collect multiple keys before returning. It also ensures that progress is banked incrementally. If a player is forced to reset or encounter an unexpected obstacle, the green indicators on the panel reflect the secured keys, preserving the work already completed. Carrying multiple keys increases the stakes of every encounter, so frequent returns to the panel are the preferred strategy for maintaining momentum.
The recommendation to install keys promptly applies to the entire search phase. Even if a key is found in a distant section, the priority should shift to securing the item at the panel. This does not mean abandoning the search for additional keys; rather, it establishes a safe return point. Players can use the panel as a base of operations, venturing out to clear adjacent sections and returning frequently. This approach balances search coverage with risk mitigation. Additionally, the green indicators provide a psychological checkpoint, confirming that each key contributes to the overall objective.
Troubleshooting and Post-Key Requirements
Players should be aware that collecting and installing all four keys does not complete the game. The four keys clear only the mechanical lock on the elevator system. Once all indicators are green, the run still requires the current keypad clue to proceed. The keypad code is a separate requirement that must be obtained and entered after the mechanical lock is resolved. Failing to account for the keypad can lead to confusion when the elevator does not open immediately after the fourth key is installed.
Troubleshooting common issues involves verifying the panel state and search coverage. If the elevator does not open after four keys, verify that all four indicators are green on the panel. Sometimes a key may be inserted but the state is not fully registered if interrupted. Re-checking the panel ensures the mechanical lock is truly cleared. If keys are difficult to find, return to the sweep methodology: check for closed drawers in cleared sections, as an open drawer indicates a previous search. Avoid assuming keys are in unsearched rooms based on memory; the lack of fixed key locations means reliance on the physical state of the furniture is more reliable. If a "Take Key" prompt does not appear, the container is empty, and the drawer should be left open before moving on.
If progress stalls, players should review the route markers. Any closed drawer in a previously swept section may have been missed or reset. Re-inspecting these containers can resolve search deadlocks. The combination of the open-drawer markers, the section-by-section sweep, and the prompt installation cycle provides a robust framework for locating all four keys and advancing to the keypad phase efficiently.
Keep the page honest
Use the version scope, source status, and verification date above when you quote this guide. If the game UI or source changes, update the claim before expanding the recommendation.
Sources to check