ESCAPE MANUAL
MONOCHROME Roblox How to Play: Beginner Guide and Walkthrough
Learn how to play MONOCHROME on Roblox: the four-key escape loop, navigation anchors, search rhythm, watcher survival, controls, and elevator exit.
Overview
MONOCHROME is a Roblox Puzzle and Escape Room experience developed by paramodal. The core objective is to wake in a sealed room, navigate an abandoned corridor network, recover four keys and one code, and escape while an entity watches. This guide explains the complete beginner loop, navigation strategies, survival mechanics, and the requirements for a successful exit based on the current build.
Core Objective and Game Loop
The official goal requires players to retrieve four keys and a single code from the environment. The experience supports up to 20 players and is currently in early development, with Part Two noted as in progress. Gameplay focuses on a search-and-escape loop within a confined, atmospheric setting.
A standard run follows this progression: 1. **Wake and Orient:** Start in the sealed room and locate the initial navigation anchors. 2. **Search and Collect:** Explore the corridor network to find keys hidden in furniture and locate the code clue. 3. **Survive:** Manage stamina and use hiding spots to avoid the watcher who patrols the area. 4. **Deposit and Unlock:** Return keys to the elevator panel and enter the code at the keypad. 5. **Escape:** Trigger the elevator once all conditions are met.
Understanding this loop helps players prioritize actions. Keys and the code are the primary progress markers, while stamina and the watcher dictate the pace and risk of exploration.
Navigation Anchors and Search Discipline
The corridor network can feature repeating layouts, making spatial awareness critical. A first run should begin by identifying specific navigation anchors to establish orientation and a safe return point.
Key landmarks include: * **Elevator Lobby:** Serves as the central hub and return point. This is where keys are deposited and the final escape occurs. * **Key-Lock Indicators:** Located at the elevator, these track your progress. Keys must be matched against the four indicators. * **Keypad:** The interface for entering the four-digit code. * **Boarded Route:** A "DO NOT ENTER" route is present in the layout. Players can remove the boards using a visible interaction prompt, often after reading tutorial context. * **Stairs:** Connect different levels of the network, including the downstairs area where the watcher patrols.
**Search Marking Strategy** Repeating corridors can cause confusion during the search. A practical method for tracking progress is to leave checked drawers open. When you search a dresser or cabinet, leave the drawer in the open position. This visual marker indicates that the room has been fully searched, allowing you to skip previously cleared areas and focus on unmarked furniture. This discipline prevents wasted time and ensures you locate all four keys efficiently.
Controls and Interactions
MONOCHROME relies on visible prompts for interactions. The build uses hold or press prompts for critical actions, ensuring players know exactly when an object can be manipulated.
**Interaction Targets** Visible prompts appear for: * Removing boards from doorways. * Opening drawers and dressers. * Picking up keys. * Accessing wardrobes. * Engaging locks. * Operating the elevator.
**Movement and Tools** One reviewer reports specific control inputs that aid navigation: * **Sprint:** Hold Shift to sprint. Sprinting consumes stamina, so monitor your stamina bar to avoid exhaustion. * **Torch:** Press F to activate a torch, which may help with visibility in the environment. * **Mouse Look:** Press M to toggle mouse look if preferred.
The exact keyboard, controller, and touch mappings are not fully documented by the official page. Players should rely on on-screen prompts and observed behavior for interaction confirmation. The environment features a high-contrast aesthetic with white screens and carpeted corridors, which can affect visual clarity; using the torch and moving deliberately can help manage visibility.
Surviving the Watcher and Hiding
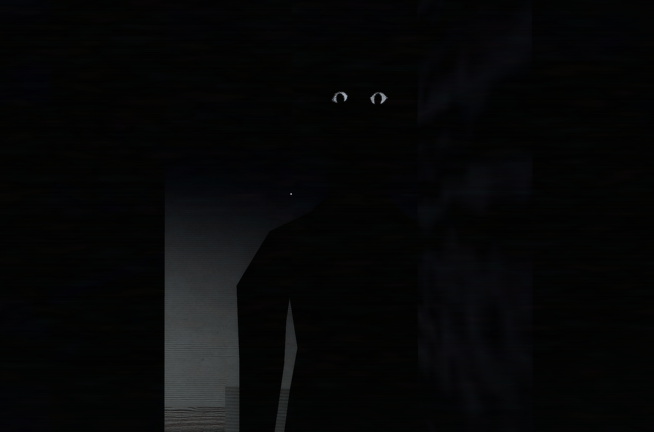
A watcher patrols the downstairs route, adding a survival layer to the puzzle loop. Detection risks increase when moving through corridors, so timing and cover are essential.
**Wardrobe Hiding** Wardrobes provide a documented hiding interaction. Players can hide inside wardrobes while the watcher patrols the area. This mechanic allows players to avoid detection and continue the search loop safely. When the watcher is active, locate the nearest wardrobe and use the interaction prompt to hide. Remain hidden until the patrol passes, then resume searching.
**Stamina Management** Sprinting is necessary for quick escapes, but it drains stamina. Running out of stamina can leave players vulnerable during a chase. Use sprint strategically: conserve stamina while searching and reserve bursts of speed for evading the watcher or returning to the elevator. The reviewed build emphasizes that sprinting has stamina costs, and players should not run continuously without checking their resources.
Keypad Code and Completion
The final stage requires solving the keypad puzzle. The code is a four-digit sequence that must be entered at the keypad near the elevator.
**Code Variability** The four-digit clue varies between sessions. The clue is generated for the current run and must be found inside the game environment. It is not a fixed promo code, and digits from previous videos or guides will not work. Players must read the clue within the maze during their active session. Copying old codes is a common error that will block progress.
**Exit Requirements** A successful exit requires satisfying two conditions simultaneously: 1. **Four Green Indicators:** All four key indicators at the elevator panel must turn green, confirming that all keys have been deposited. 2. **Accepted Keypad Entry:** The keypad must accept the correct four-digit code.
Once both conditions are met, the elevator prompt appears. Interact with the elevator to complete the escape. The game does not guarantee a specific ending sequence beyond the elevator opening, as the build is in early development.
Common Beginner Mistakes
Avoid these errors to streamline your run: * **Using External Codes:** The keypad clue changes per run. Never copy digits from old guides; always find the clue in your current session. * **Ignoring Markers:** Failing to leave drawers open can lead to re-searching rooms in repeating corridors, wasting time and increasing exposure to the watcher. * **Stamina Exhaustion:** Sprinting without monitoring stamina can leave you unable to escape the watcher. Manage your sprint usage carefully. * **Missing Prompts:** Overlooking visible interaction prompts can cause you to miss keys, locks, or hiding spots. Always check for prompts on furniture and doors. * **Rushing the Boarded Route:** The boarded route requires a specific interaction to remove the boards. Attempting to force through without using the prompt will block your path.
Keep the page honest
Use the version scope, source status, and verification date above when you quote this guide. If the game UI or source changes, update the claim before expanding the recommendation.
Sources to check